Introduction
Vim color schemes are a useful feature of this popular text editor. Not only do they allow for practical syntax highlighting, but they also give users a chance to personalize the interface.
As a Vim user, you can change color schemes that come with the software package or install user-made color schemes. Also, the software allows you to configure the colors of individual elements manually.
In this tutorial, learn how to use and set Vim color schemes.

Prerequisites
- Vim text editor
- Access to terminal window / command line
Note: In case you don’t have this text editor on your system, you may need instructions on how to install Vim on Ubuntu or how to install Vim on CentOS.
View Vim Color Schemes Installed
There are a number of different Vim color schemes locally available.
Upon installation, the text editor uses a default scheme, which may vary depending on whether you are using a light or dark terminal. The default Vim color scheme in a light terminal is peachpuff. If you use a dark terminal, the initial color scheme is ron.
To see a list of ready-to-use themes, open any document using the Vim editor and use the following instruction:
:colorscheme [space] [Ctrl+d]The output shows a list of Vim color schemes, which you can also see in the image below.

How to Change Vim Color Scheme
After prompting Vim to display a list of color schemes, you can experiment and change the design until you find one you like best.
To change Vim color scheme use the following command:
:colorscheme [colorscheme_name]You can even use an abbreviation of the instruction and type:
:colo [colorscheme_name]For instance, to switch to the color scheme blue, you would use:
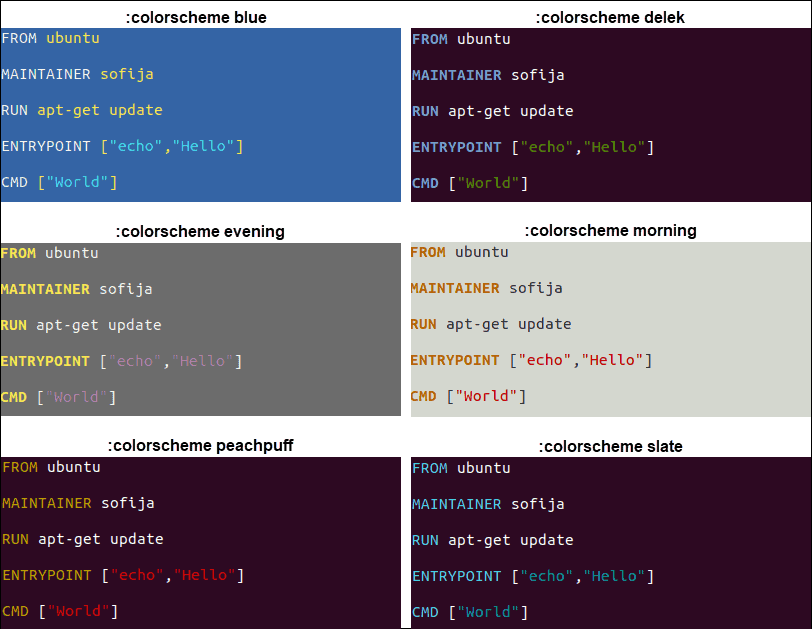
:colorscheme blueHere are just some examples of how the color schemes differ:

Download Vim Color Schemes
There is a wide variety of user-made color schemes that may suit your needs better than the locally given options. You can find and download them from GitHub or websites such as vim color schemes.
Add a new theme to your repository by downloading it from a remote source. Once you install a new color scheme on your local machine, make sure to move it to the /vim/colors directory.
If you do not have such a directory, create one with the command:
mkdir ~/.vim/colorsNow move the new scheme into it:
mv ~/Downloads/[vim_colorscheme] ~/.vim/colorsSet Vim Color Settings Manually
If none of the schemes satisfy your aesthetic, you can configure the color settings manually.
It’s a good idea to test out the color setting features before you commit the changes. You can do this using the vim text editor within an existing file.
The syntax is:
:highlight [Group] [key=value]Note: You can substitute highlight with hi for short.
While highlight is the instruction, the [Group] element is the item(s), which should be affected by the key-value modifiers.
There are numerous groups you can define in the previously mentioned command. Some of them include:
- Normal (normal text)
- NonText (characters that don’t exist in the text)
- Cursor (the character under the cursor)
- ErrorMsg (error messages)
These are just some out of the many Vim highlight groups. To see an extensive list of all the groups, refer to Vim’s official documentation.
Vim Highlight Keys
The key=value element varies depending on whether you use a GUI or work in a terminal window.
For example, if you are working inside a terminal that has color support, you could include any of the following highlight keys:
ctermfg(for setting the foreground)ctermbg(for setting the background)cterm(for additional properties)
Users who prefer the GUI need to use the highlight keys:
guifg(for setting the foreground)guibg(for setting the background)gui(for additional properties)
When specifying the values for ctermfg, ctermbg/guifg, guibg, you can use standard color names, their prescribed numbers or hex values (only in the GUI).
However, cterm and gui are not used with color values. Instead, the values you use for these highlight keys include: bold, italic, underline, reverse, and none.
Using the Vim highlight Command
The best way to show how the highlight command works, is with a simple example.
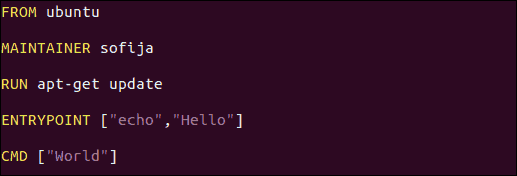
Take a look at this file and its initial color scheme when opened with the Vim text editor:

Now, let’s set all Normal text to be red (foreground) and the background color to black. To do this we need to type the following:
:hi Normal ctermfg=Red ctermbg=BlackPress Enter and the colors should automatically change as in the image below.

How to Set Default Vim Color Scheme
Changes you have made to the color settings are not permanent. Once you close Vim, the color scheme returns to the default settings.
To make the changes permanent, modify Vim’s configuration file with the wanted color settings.
First, you need to open the Vim startup file, located in /etc or users home directory under the name .vimrc (or .exrc).
Here, you can set the default color scheme by modifying the colorscheme line and setting the theme you prefer.
colorscheme [colorscheme_name]To enable the syntax highlight feature you also need to include the following line:
syntax onWhen manually configuring syntax highlighting, you can add individual instructions with the highlight command. Just add the lines to the existing configuration file, following the standard highlight syntax.
Conclusion
After reading this article, you should have some basic knowledge of Vim color schemes. You should also know how to change the color settings and find the best solution for you.
Don’t be afraid to experiment with the color configuration.