Introduction
Jenkins is a platform-agnostic application for continuous integration and delivery, known as CI/CD. The software helps developers automate tasks and software testing during the software development lifecycle. As a result, end-users receive the newest software upgrades faster and with fewer bugs.
This guide provides a detailed and practical introduction to using Jenkins.
Prerequisites
- Jenkins installed.
- Web browser access.
- Access to the command prompt/terminal with administrator/sudo privileges.
What is Jenkins?
Jenkins is a server that encompasses various integration, testing, and deployment technologies as pre-built packages on one unified platform. As an open-source tool written in Java, Jenkins helps developers automate routine tasks and provide new builds as quickly as possible.
Note: The CI/CD pipeline is a compute intensive job, and our Bare Metal Cloud servers provide the necessary resources on dedicated hardware. Check out the pre-configured compute instances to get started.
Jenkins is the leading pipeline automation server for development and is an integral CI/CD tool. The setup is straightforward and flexible, allowing a vast combination of source code and languages through a plugin-based system.
What is Jenkins Used For?
Jenkins' main features are jobs and pipelines, which allow the following:
- Continuous integration pipelines for applications and Infrastructure as Code (IaC), which helps automate building and testing.
- Continuous delivery pipelines through automated delivery workflows, which achieves non-stop code deployment.
- Automation jobs and pipelines for routine tasks, such as backup management, service statistics, etc.
Jenkins Tutorial for Beginners
The following sections showcase how to set up and use Jenkins post-installation.
Note: To install Jenkins, follow one of our OS-based guides for:
Before continuing, make sure the Jenkins service is running. To check, run the following command in the Linux terminal:
sudo systemctl status Jenkins
The service lists as active.
If you're using Windows, continue to the next section.
Note: If the service is not running, follow our guide to restart Jenkins manually.
Accessing Jenkins
Open the browser and access the program through the following URL:
localhost:8080The Unlock Jenkins page appears for the first-time setup. If you already have Jenkins installed, the login page loads.
If the page does not show up, the firewall blocks the port or is unavailable. Check your firewall settings and allow traffic on the default port (8080) or change the Jenkins port.
In Linux, to enable traffic on port 8080 in the default UFW firewall, run the following commands:
sudo ufw enable
sudo ufw allow 8080
sudo ufw status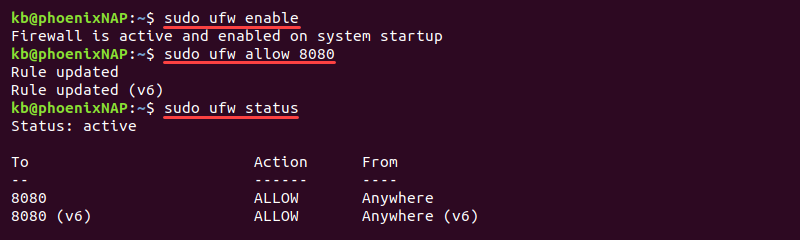
The commands enable the firewall and change the rules to allow traffic through Jenkins' default port.
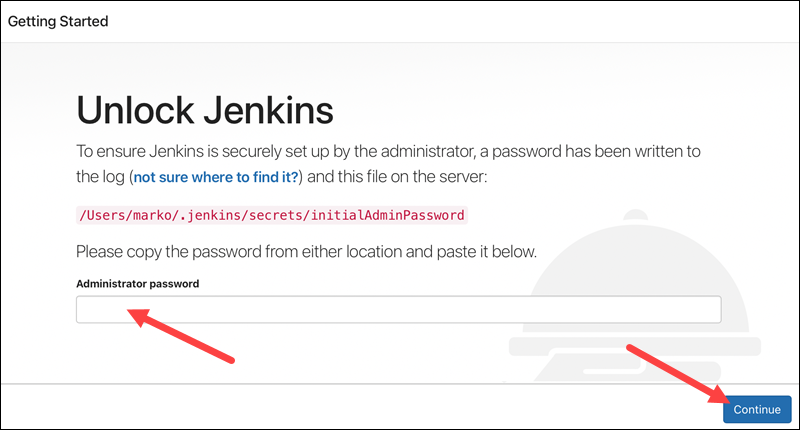
Unlocking Jenkins
The Unlock Jenkins page requires an administrator password to continue the installation. To fetch this password on Linux, run the following command in the terminal:
sudo cat /var/lib/jenkins/secrets/initialAdminPassword
For Windows, the initial admin password file is in the location displayed by the Unlock Jenkins page. If the folder is hidden, enable viewing hidden items.
Copy and paste the character sequence into the Administrator password field and click Continue.
Note: Visit our post Jenkins vs. Kubernetes to learn how these two open-source tools differ.
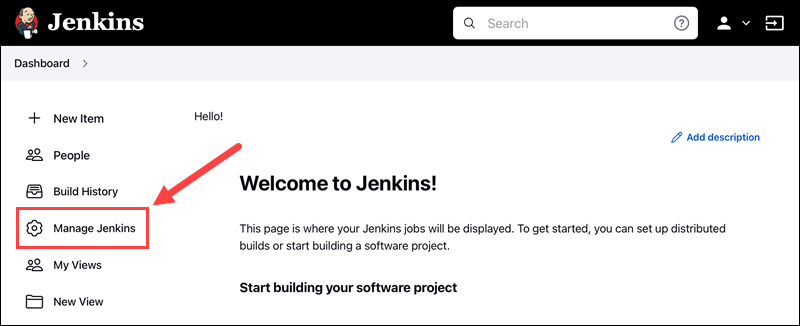
Jenkins Management
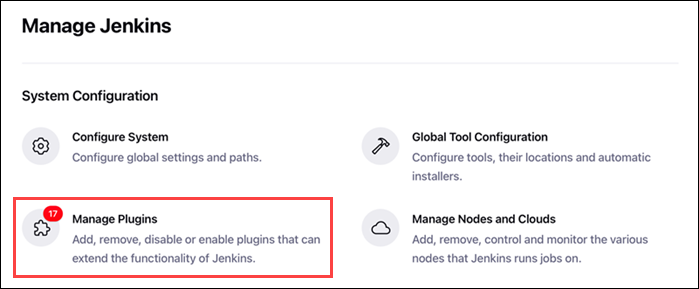
To enter the Jenkins management page, click Manage Jenkins in the left menu.
The management options divide into sections based on functionality.
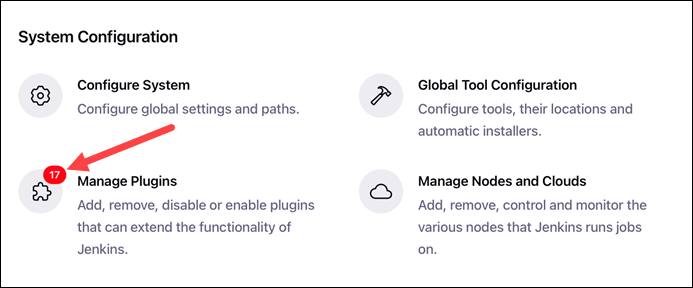
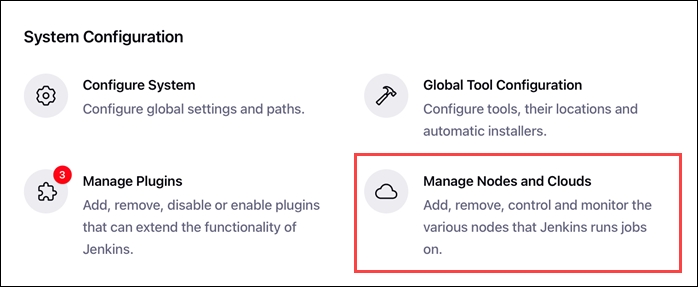
System Configuration
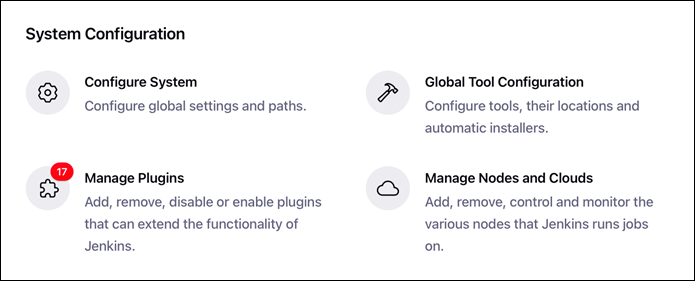
- Configure System manages paths and global options for Jenkins.
- Global Tool Configuration manages tools, their locations, and automatic installers.
- The Manage Plugins page is the primary option for plugin control, such as installing, removing, and disabling existing plugins.
- Manage Nodes and Clouds is the central place to manage Jenkins' nodes and clouds.
Security
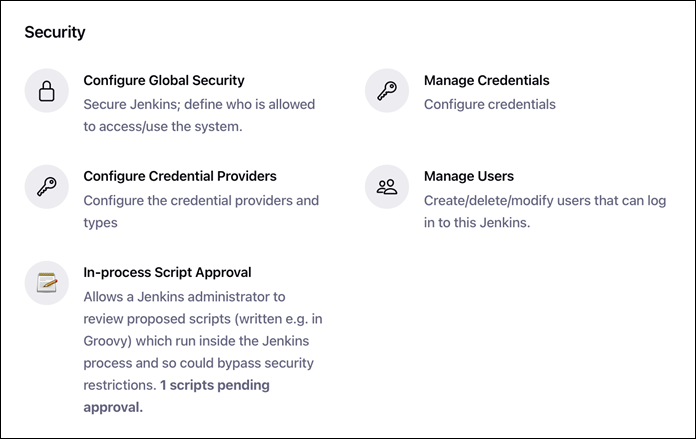
- Configure Global Security is where the general security management takes place, such as authentication, authorization, SSH server options, etc.
- Manage Credentials provides an overview of credentials for plugins and apps which require authentication.
- Configure Credential Providers allows excluding and restricting certain credential providers.
- Manage Users lists the users who can access Jenkins.
- In-Process Script Approvals helps manage which scripts the system administrator must overview and approve before use.
Status Information
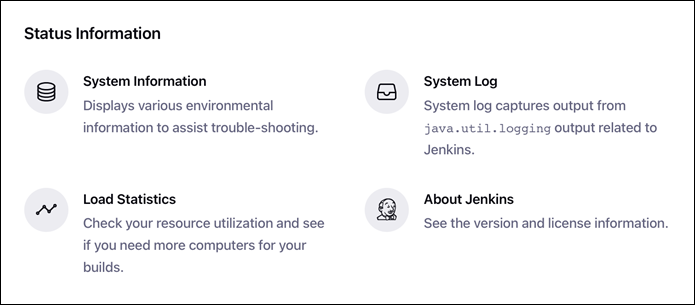
- System Information displays environment information, such as program information, environmental variables, plugin versions, and memory usage. Use this option to troubleshoot issues with Jenkins.
- System Log keeps the Jenkins log records.
- Load Statistics shows the resource use and valuable performance metrics.
- About Jenkins shows the license and dependency information for plugins.
Troubleshooting
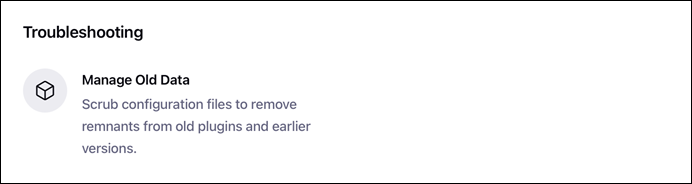
- Manage Old Data helps manage changes to data storage, either due to downgrades or plugin removal.
Tools and Actions
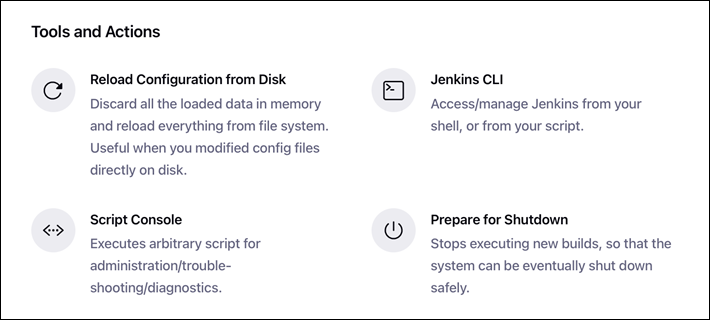
- Reload Configuration from Disk reloads all changes to the config files. This option is useful when changes happen on the disk.
- Jenkins CLI provides information on how to run Jenkins from the CLI and the documentation for the commands.
- Script Console is a built-in Groovy script console for running scripts and troubleshooting directly from Jenkins.
- Prepare Shutdown opens the interface for a safe Jenkins server shutdown.
Configuring Jenkins
Jenkins offers many global configuration options. The primary function is to set paths for various plugins.
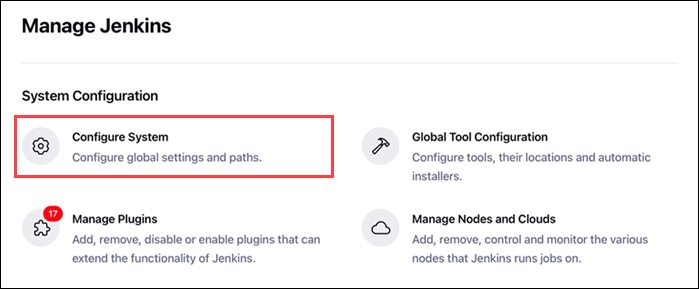
To access the Jenkins configuration:
1. On the Dashboard, select Manage Jenkins.
2. Choose Configure System.
Below are explanations for each field's function.
Home Directory
The first field on the Configure System page is the Home directory.

The path is where Jenkins stores all the data on the file system.
System Message
The following section shows a text box for entering a System Message.
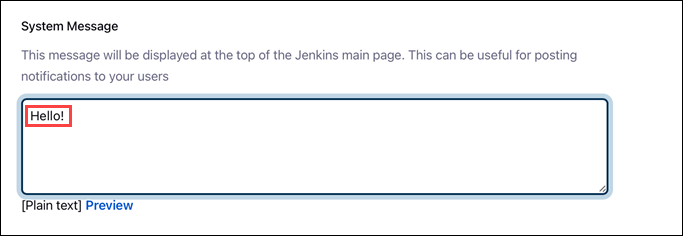
The message shows up on the Jenkins main page.
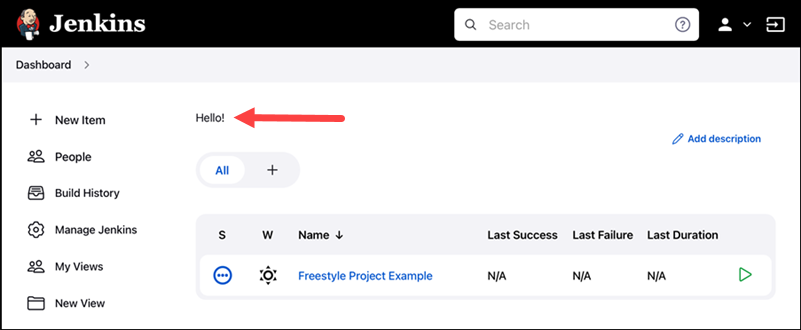
The message is visible for all users when they log in. Use the message to display information and notifications.
Jenkins Location
The Jenkins Location section consists of two fields:
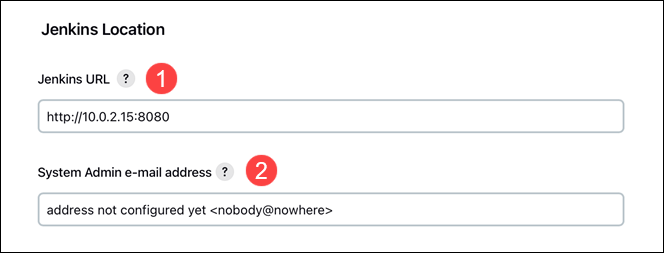
1. Jenkins URL - The URL is http://localhost:8080 by default. Jenkins displays a warning about using localhost as the hostname. Change the hostname to the numerical address, and the warning resolves.
2. System Admin e-mail address - Notifications from Jenkins to project owners come from this e-mail. The two allowed e-mail formats are:
- [email protected]
- Name Surname <[email protected]>
Global Properties
The Global Properties section includes two key checkboxes:

1. Environment variables allow defining global variables available for any job or pipeline. For more on environment variables, follow our tutorial for Jenkins environment variables.
2. Tool locations allows specifying tool locations by hand, overriding global configuration.
E-mail Notification
The E-mail Notification settings are for configuring the SMTP e-mail server, in addition to the Default user e-mail suffix for all users.
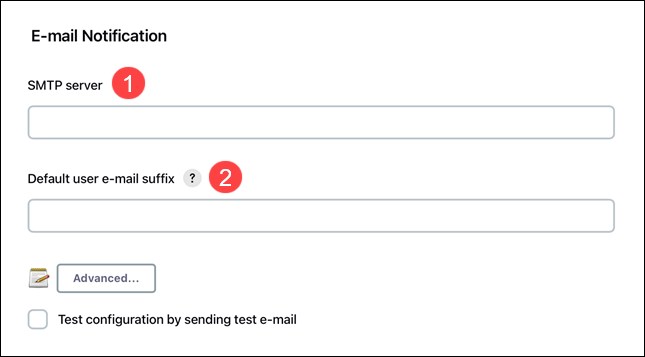
For example, use @<company name>.com if most users have the e-mail in that format. Users can override the suffix when necessary.
Managing Plugins
Navigate to Manage Plugins from the Manage Jenkins page to handle Jenkins plugins. Plugin maintenance covers installing, uninstalling, and updating plugins.
Install a Plugin
To install a Jenkins plugin, follow the steps below:
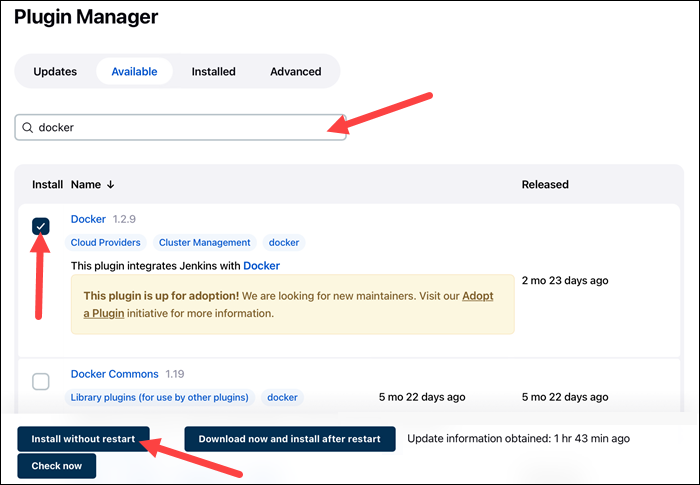
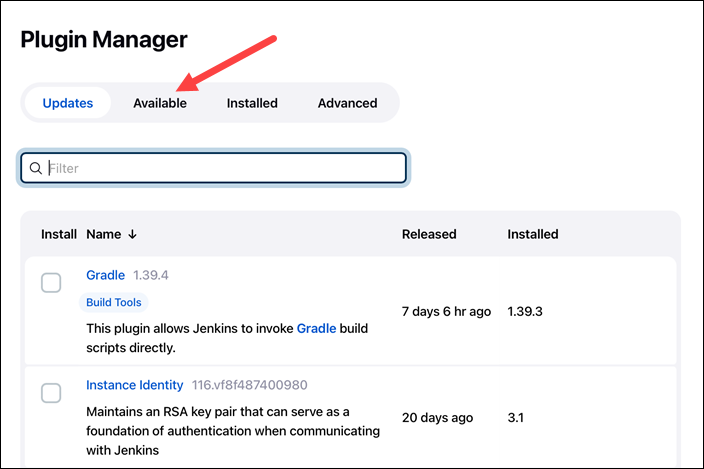
1. On the Manage Plugins page, click the Available tab.

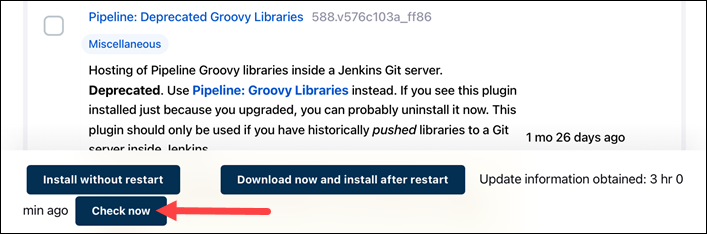
2. The list displays all the available plugins. Search for a plugin in the search bar.

If the plugin does not show up, click Check now to update information.
3. Click the checkbox next to the plugin's name and select Install without restart.
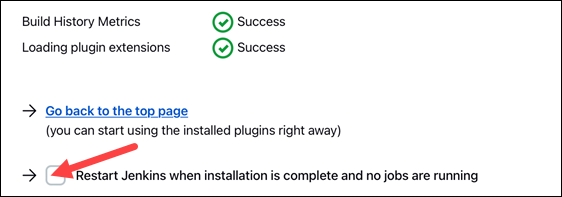
4. The page shows installation progress. When the plugin installs, click the Restart Jenkins checkbox to restart Jenkins automatically.
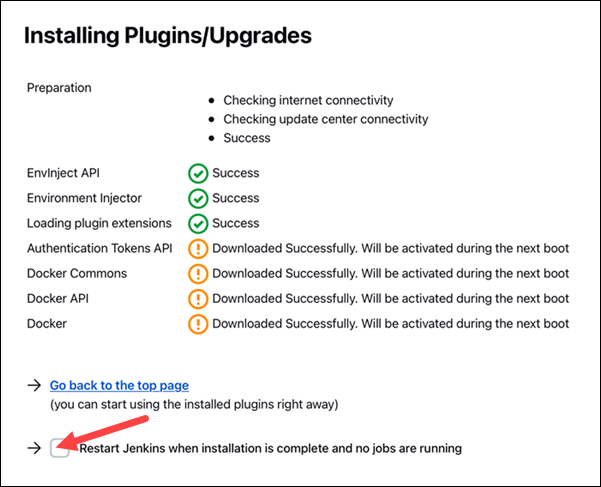
Continue working as usual in Jenkins while the installation runs in the background. When complete, Jenkins restarts and shows the login page.
Uninstall a Plugin
To uninstall a plugin from Jenkins, follow the instructions below:
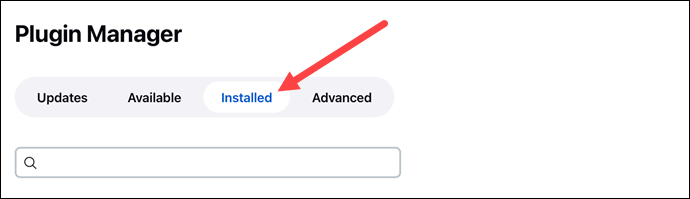
1. On the Manage Plugins page, click the Installed tab.
2. Enter the plugin's name in the search box to filter information.
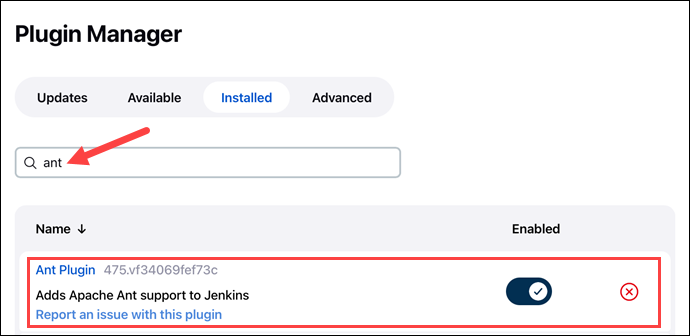
3. Click the Uninstall button in the last column.
4. A warning page appears, asking to confirm the uninstall.
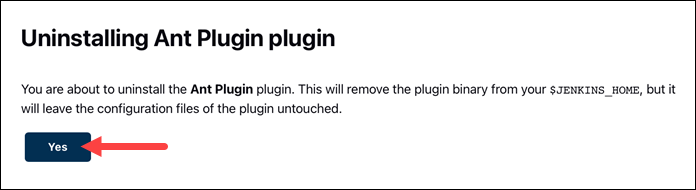
Click Yes to remove the plugin.
5. Restart Jenkins to complete the uninstall.
Update a Plugin
When plugin updates are available, a notification appears visible from the Manage Jenkins page.
Updating a plugin is optional due to dependencies. To update a plugin, do the following:
1. On the Manage Plugins page, a list of available updates shows up in the Updates tab.
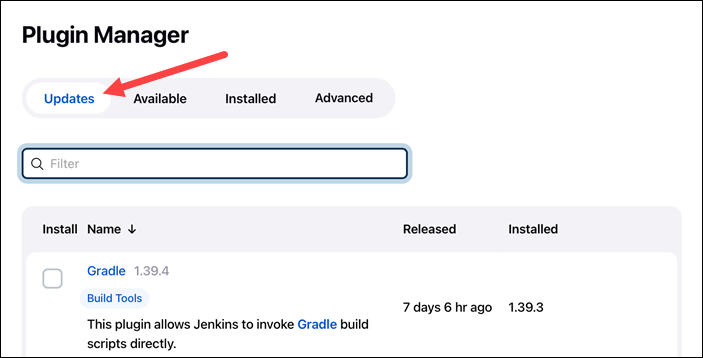
2. At the footing of the page are options for quick selection. Choose All to update all the plugins or Compatible to update only those with compatible dependencies.

Alternatively, search a plugin by name and click the checkbox to update a specific plugin.
3. Click Download and install after restart.
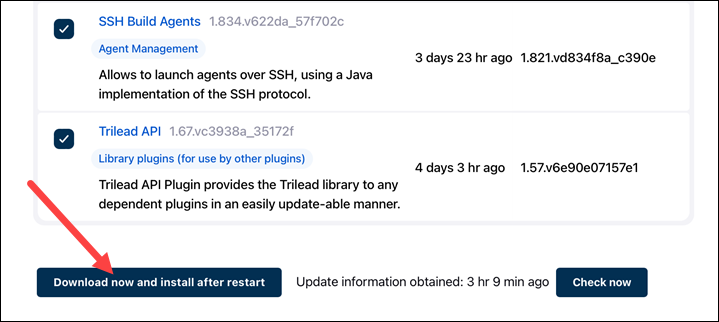
4. The updates download automatically.
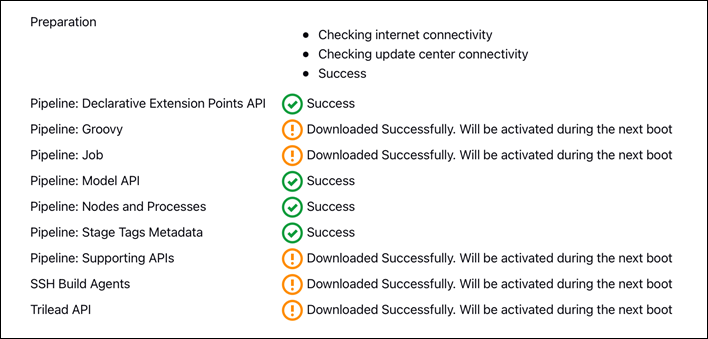
When complete, restart Jenkins, and the updates activate immediately.
Setting Up Git
Git comes as a plugin for Jenkins. The Git plugin installs when choosing the Install suggested plugins option during the installation process.
If the plugin is not available already, follow the instructions below.
Note: The setup showcases the steps for a preinstalled Git. To install Git, follow one of our installation guides for:
Step 1: Install Git Plugin
If you already have the Git plugin, skip to the next section. Otherwise, to install the Git plugin, do the following:
1. On the Dashboard page, click Manage Jenkins.
2. Select Manage Plugins.
3. Select the Available tab.
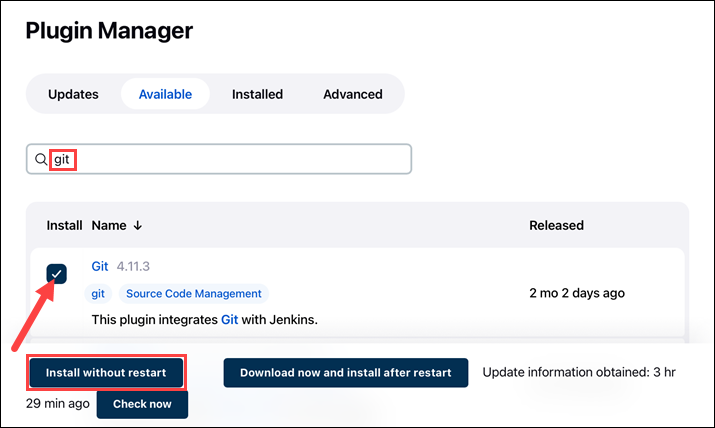
4. Search for Git in the search bar and press Enter.
5. Tick the checkbox next to the plugin and click Install without restart.
6. Once the plugin installs, restart Jenkins and continue to the next step.
Step 2: Set Git Path
To set up the Git plugin, follow the steps below:
1. On the Jenkins Dashboard page, click Manage Jenkins.
2. Select Global Tool Configuration.
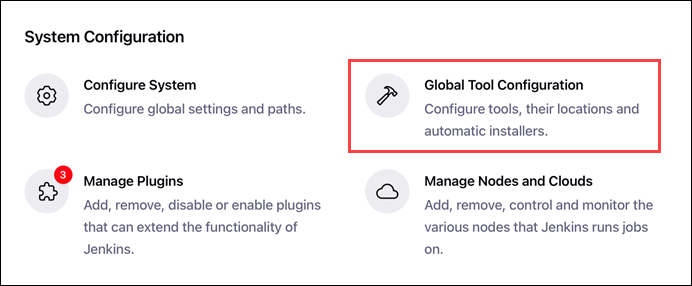
3. Scroll down to the Git section.
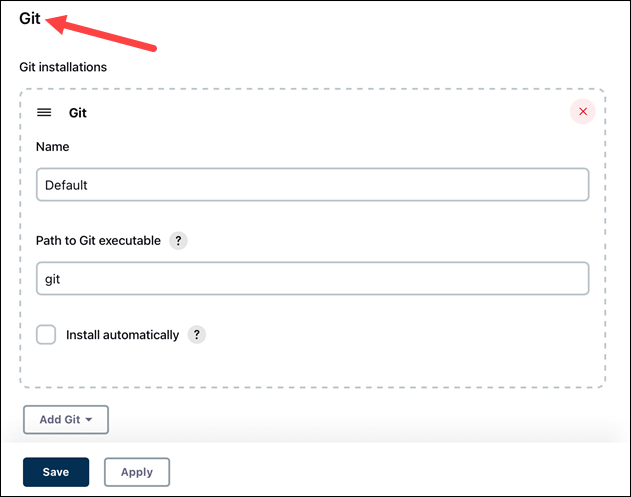
4. Change the Path to Git executable to the path on the machine. To check the path on Linux, use the whereis command:
whereis git
On Windows, run the following command in the command prompt to get the path:
where git.exe
Note: If the command does not show a path, add the git binary to the PATH environment variable.
Paste the path into the field and click Save.
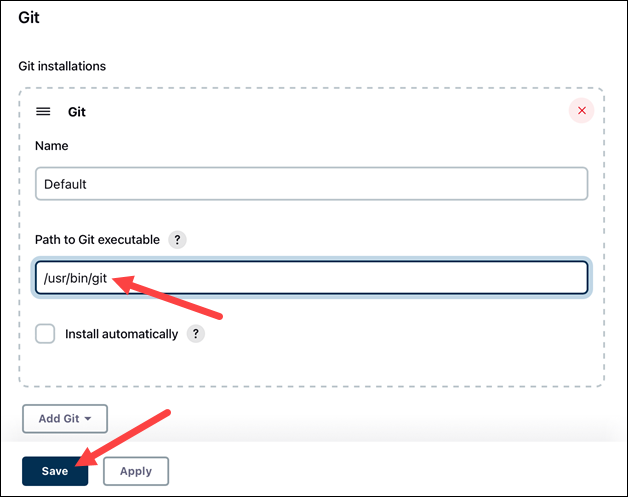
Git now links correctly after installation and is available when creating projects.
Setting Up Tomcat
Setting up Jenkins on Tomcat is easy. The setup assumes Tomcat was previously installed and configured.
Note: To install Tomcat, follow one of our guides for:
Follow the steps below to set up Jenkins on Tomcat.
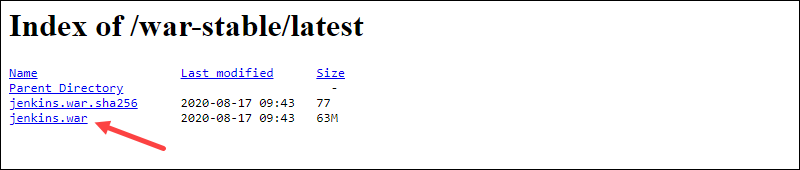
1. Retrieve the jenkins.war file. For Linux, run the following command to retrieve the file:
wget https://get.jenkins.io/war-stable/latest/jenkins.warIf you're using Windows, download the jenkins.war file from the download page.
2. Move the file to Tomcat's webapps directory to directly deploy Jenkins on Tomcat. On Windows, do this through the GUI. On Linux, run the following command:
sudo mv jenkins.war /opt/tomcat/webapps/jenkins.warMoving the file generates a Jenkins directory.
3. Lastly, access Jenkins through the browser by following the link:
http://localhost:8080/jenkinsNote: If Jenkins is already on the machine, change the Jenkins port to 8081 or another free port and follow the steps.
Continue the Jenkins setup by following the installation instructions.
Setting Up Maven
Integrating Maven with Jenkins allows using Maven commands through the Jenkins interface. Follow the steps below to set up Maven in Jenkins.
Step 1: Install Maven Plugin
To install the Maven integration plugin:
1. From the Dashboard, select Manage Jenkins.
2. Choose Manage Plugins.
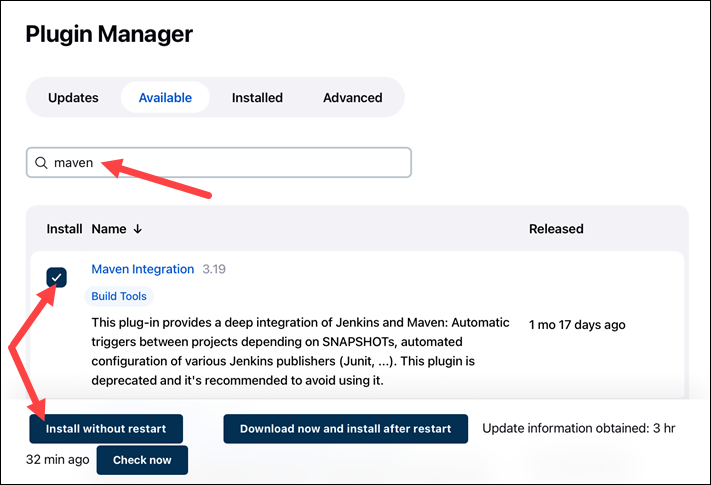
3. Select the Available tab.
4. Search for the Maven integration plugin.
5. Click the checkbox and select Install without restart.
6. Select the Restart Jenkins after installing checkbox. When the installation completes, Jenkins automatically restarts.
Continue to the following steps to add the required dependencies from the local machine.
Step 2: Set JDK Path
Connect the local JDK installation by setting the path:
1. On the Dashboard, open Manage Jenkins.
2. Navigate to Global Tool Configuration.
3. Locate the JDK section and click Add JDK.
4. Set a descriptive name and add the JDK path. To find the path on Linux, run the following command:
update-alternatives --list java
Copy the parent path for /bin/java and add it to Jenkins.
5. Uncheck the Install automatically box.

Proceed to the next step to set the Maven path.
Step 3: Set Maven Path
Continue the setup from the Global Tool Configuration page.
1. Locate the Maven section and click Add Maven.
2. Set a descriptive name and the Maven path on the local machine.
3. Uncheck the Install automatically box.
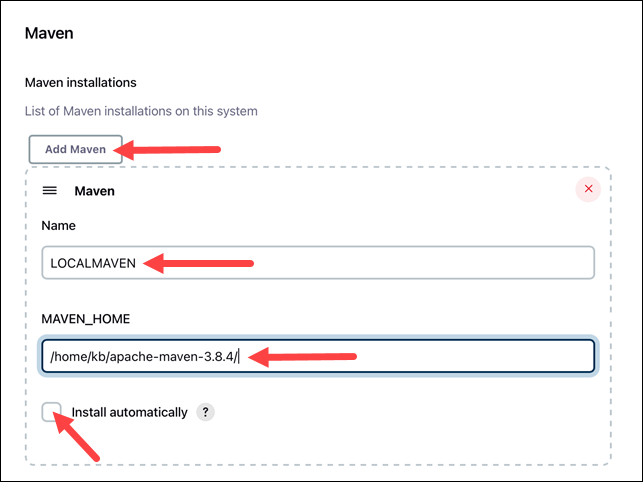
4. Click Save to save the changes.
Setting Up Build Jobs
Below is an example for creating a straightforward GitHub build job in Jenkins.
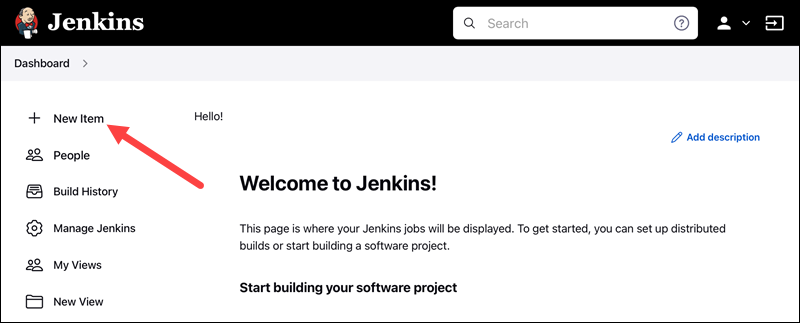
1. On the Dashboard, click New Item.
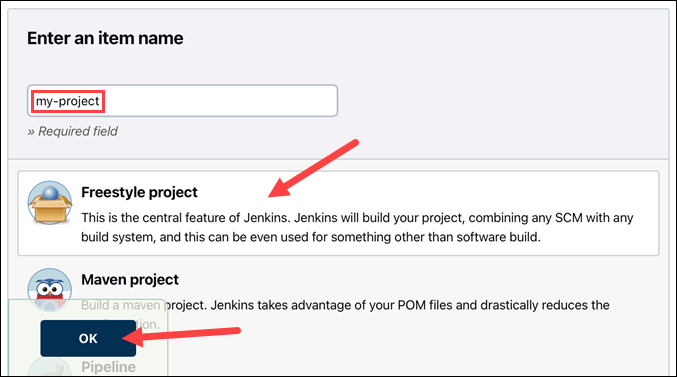
2. Set the project name.
3. Select Freestyle Project and click OK.
Depending on the project, the steps after this point vary. The example provided below makes a GitHub project. However, other configurations and possibilities exist.
1. Tick the GitHub project checkbox.
2. Provide the URL for the hosted project without branch information. For example:
https://github.com/phoenixNAP-KB/test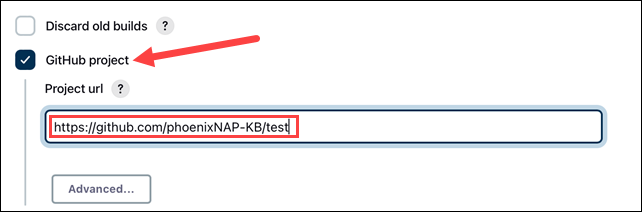
3. Navigate to the Source Code Management section and select Git.
4. Add the repository URL. Use the same URL from step 2 and add .git at the end. For example:
https://github.com/phoenixNAP-KB/test.git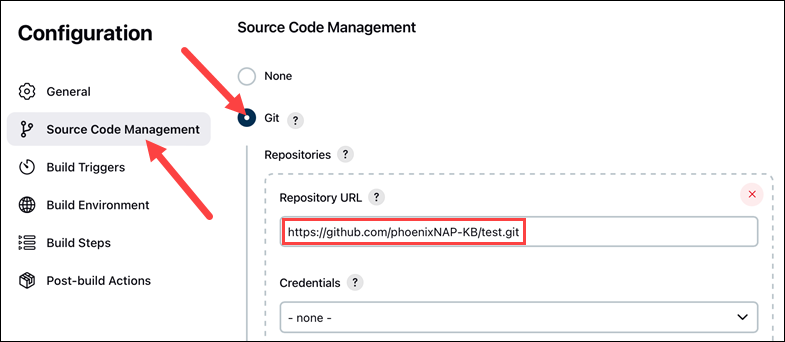
5. In the Branches to Build section, change the branch name master to the actual branch name in the project.
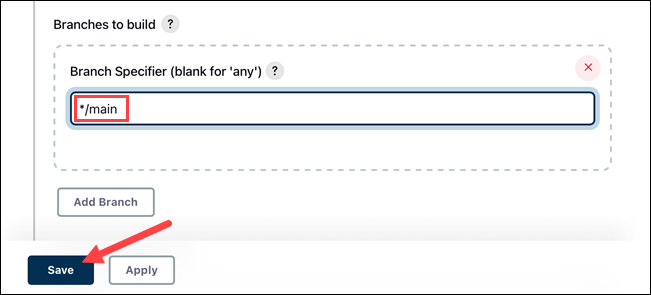
6. Click Save to finish the setup.
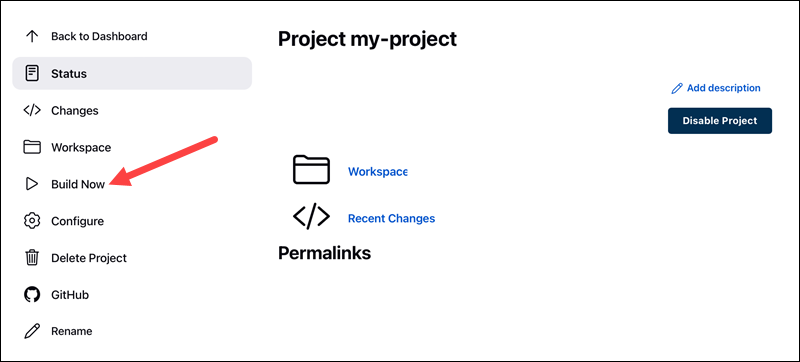
7. Click Build Now to build the project in the left menu.
The build status shows up under Build History.
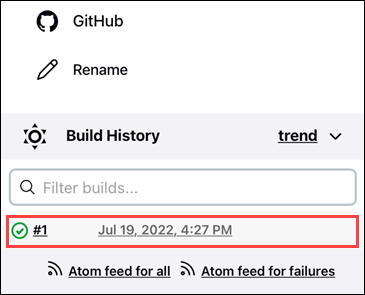
The build completes in a few moments. A successful job shows a green checkmark and the build time.
Jenkins Distributed Builds
Jenkins offers the option to run distributed builds. Distributing the task on various nodes helps provide a balanced setting, taking the load off the central machine.
Additionally, distributed builds help when testing code on multiple locations by assigning each environment to a dedicated node.
Create and Configure a Node
To create a node in Jenkins, do the following:
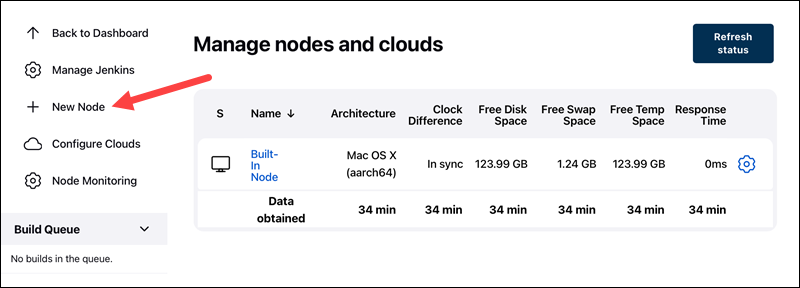
1. On the Dashboard page, open Manage Jenkins.
2. Click Manage Nodes and Clouds.
3. Click New Node in the left pane.
4. Give the node a name and select the Permanent Agent option.
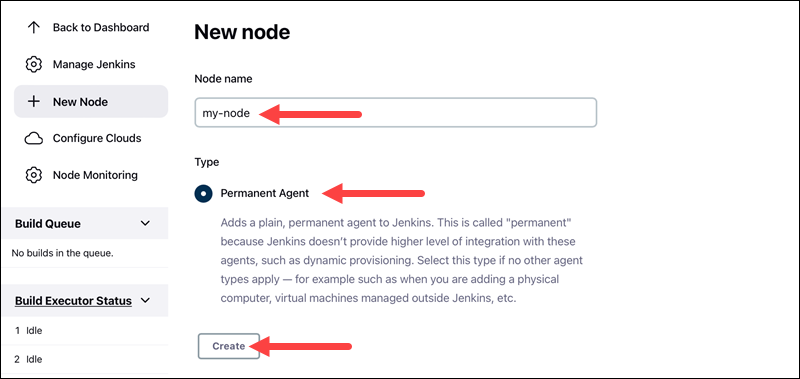
Click Create to proceed.
5. Configure the node. Provide the following information:
- The remote root directory for the node.

- Launch method.
6. Save the node. Depending on the launch method, the node either:
- Starts by itself.
- Further instructions apply, viewable from the node page by clicking the node name.
Jenkins Deployment
Jenkins offers numerous options for project deployment. Before working with deployments, install a plugin for your use case. Some of the available options are:
- The Docker pipeline builds and uses Docker containers.
- The Ansible plugin invokes commands and playbooks.
- The Kubernetes plugin enables continuous cluster deployment.
- The Deploy container to plugin allows remote war deployment on servers such as Tomcat.
Search for available plugins on the Manage Plugins page for a more comprehensive list.
Note: Deploy Jenkins on a Kubernetes cluster to always ensure resource availability for Jenkins.
Jenkins Testing
Jenkins offers numerous test automation tools for the CI/CD pipeline. Testing plugins help run test suites and accomplish unit, automated and remote testing.
The suites integrate into the pipeline directly and provide:
- Summarized results as HTML web pages.
- Historical overview for tracking trends from previous builds.
- A detailed failure logging and summary of the test results.
The testing tools integrate into the pipeline as a post-build step.
Managing Metrics for Builds
Metrics help display metrics of builds over time. To see an example, follow the instructions below for installing the Builds History Metrics for all plugins:
1. Navigate to the Manage Jenkins page.
2. Select Manage Plugins.
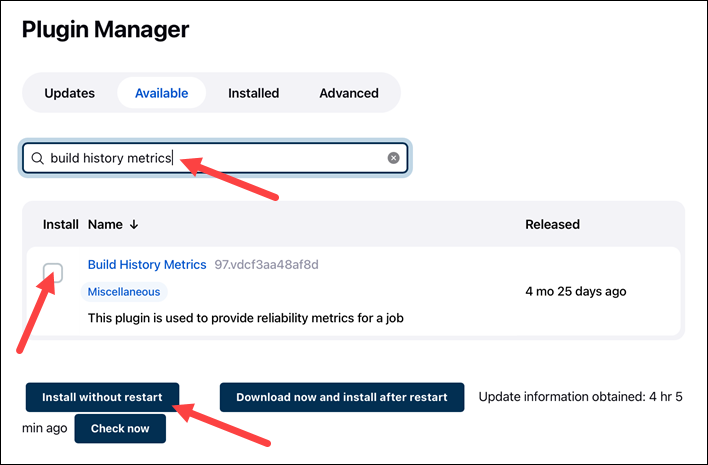
3. In the Available Plugins tab, search for Build History Metrics.
4. Click the box, followed by Install without restart.
5. Check the Restart after install option.
Jenkins automatically restarts when the installation completes.
6. Navigate to a build page.
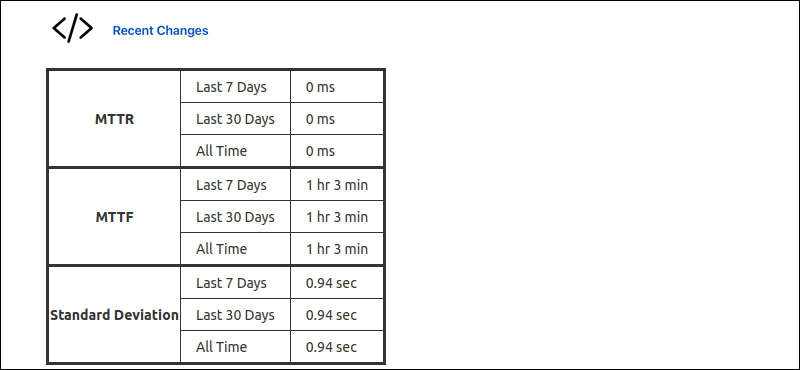
A table displays the following calculated metrics for the build:
- Mean Time To Recovery (MTTR)
- Mean Time To Failure (MTTF)
- Standard Deviation of Build Times
For different metrics and graphical displays, other plugins are available.
Jenkins Security
Jenkins' security consists of many aspects. One important part is creating users and granting relevant permissions. For example, job creation and other administrative tasks should only be available to the system administrator.
Follow the steps below to create and manage users in Jenkins.
Step 1: Create Jenkins Users
To set up Jenkins users, do the following:
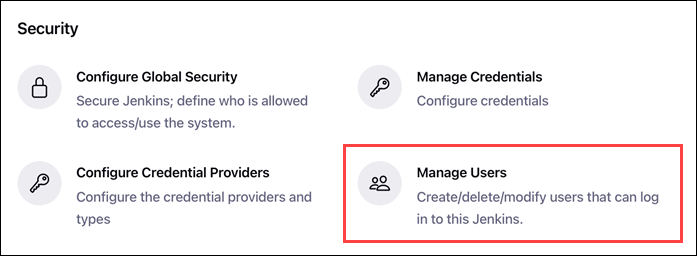
1. On the Manage Jenkins page, click Manage Users.
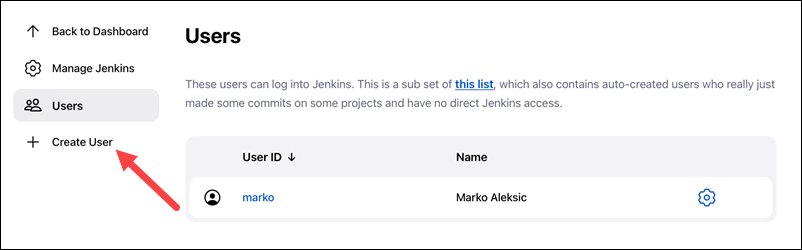
2. Click Create User on the left pane.
3. Fill out the form fields and click Create User.
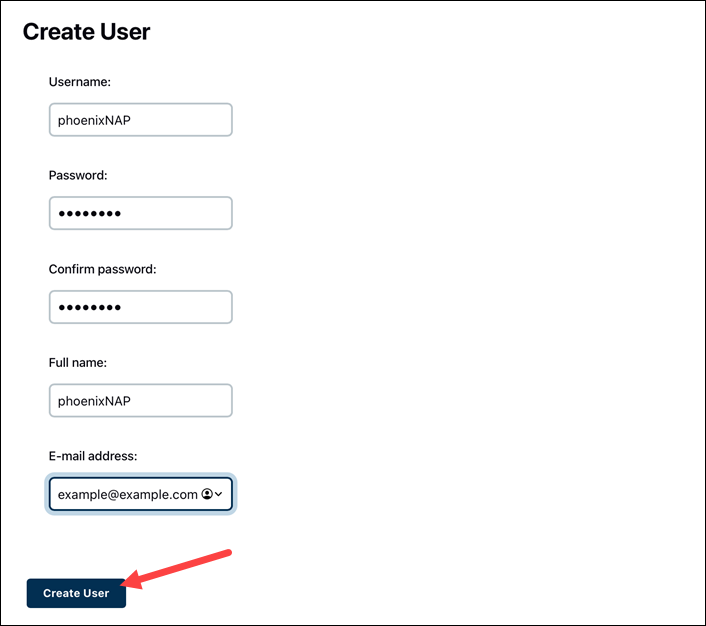
The new user shows up on the user list.
Step 2: Manage Authorization
To manage the user's authorization:
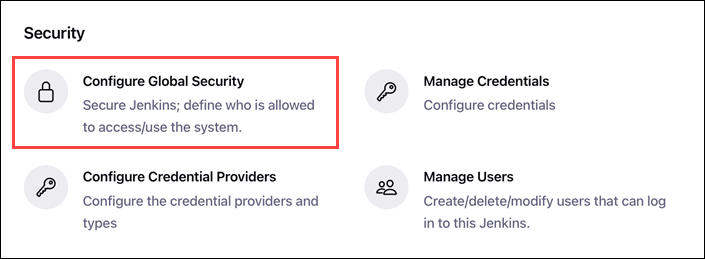
1. From the Manage Jenkins page, click Configure Global Security.
2. Under the Authorization section, select Matrix-based security.
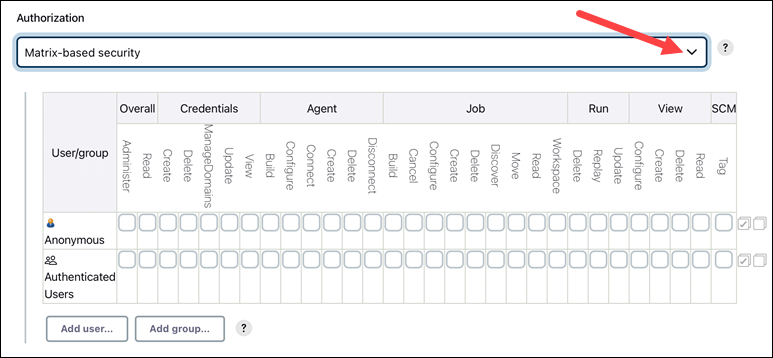
Two user groups show up by default: Anonymous and Authenticated users.
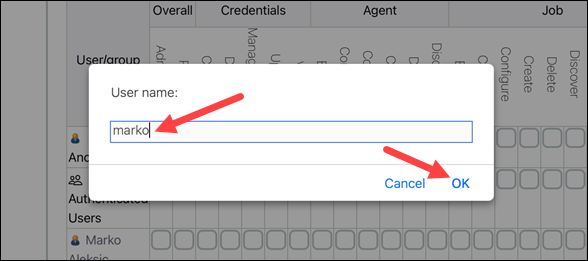
3. To add a specific user, click Add user.
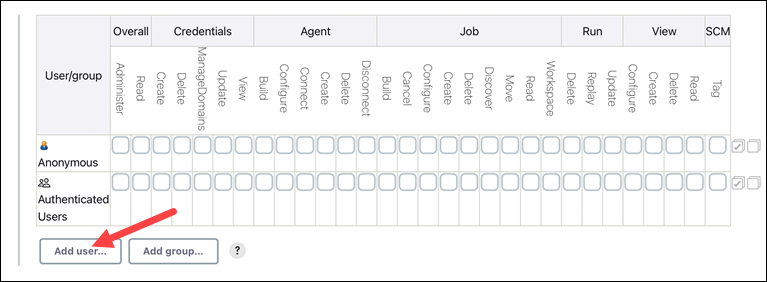
4. A prompt pops up. Enter the username and click OK.
5. Click the checkboxes to select the privileges for the user.
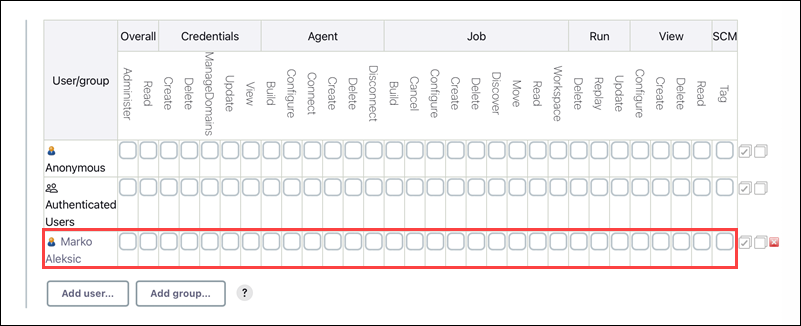
Save the changes to apply the rules.
Note: Learn how to set up and configure Jenkins Shared Libraries.
Conclusion
After following the steps from this tutorial, you have the basic information necessary to set up Jenkins. Further configuration and detailed setups depend on the project structure and the end goal.
For more Jenkins tutorials, read our article and learn how to change Jenkins Home directory.
