Introduction
Ubuntu 18.04 (codenamed Bionic Beaver) is a free, open-source distribution of Linux, based on the Debian operating system. 18.04 was released in April 2018 and it is an LTS (long-term support) version publicly supported until 2023.
In 2020, Ubuntu 18.04 was succeeded by Ubuntu 20.04 as the latest LTS version.
In this tutorial, you will learn how to install Ubuntu 18.04.
Prerequisites
- 2 GHz dual-core processor, at least
- 4 GB system memory
- 25 GB of free space on the hard drive
- A DVD drive or USB port
Important: The support period ends soon, and Ubuntu 18.04 will reach its EOL (end of maintenance and support) on April 30, 2023.
Step 1: Download Ubuntu 18.04 ISO File
Before you start, make sure you have read the prerequisites, and you have all the recommended system requirements. If you are confident that your system can support the new OS installation, take the first step, and download Ubuntu 18.04.
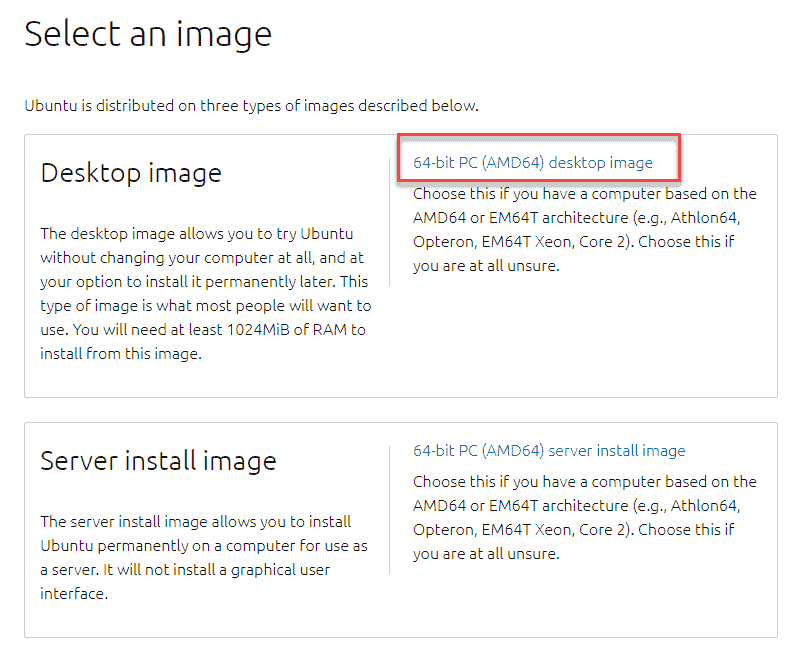
1. Open a browser of your choice and navigate to the Ubuntu 18.04 official download page.
2. You will see two available packages – Ubuntu 18.04 for Desktop and Ubuntu 18.04 for Server.
We shall download and install the desktop version.
3. Select the 64-bit PC (AMD64) desktop image link to start downloading the package.
4. It will take a couple of minutes to download the .iso file. Once it is done, move on to creating a bootable USB or DVD.
Step 2: Create a Bootable USB
The next step is to create a way to transfer the installation package to your system. You will want your computer to boot from the USB on which the package is on. To do that, you need to create a bootable USB.
This process requires at least a 2GB flash drive and software that creates bootable USB flash drives. There are many options to choose from (Rufus, UUI, UNetbootin, PowerISO, and so on).
For this example, we are going to use Rufus, as it is much faster than the alternatives out there. It is also free and open-source.
1. Download Rufus from the official website. Navigate to the webpage and scroll down to the Download section.
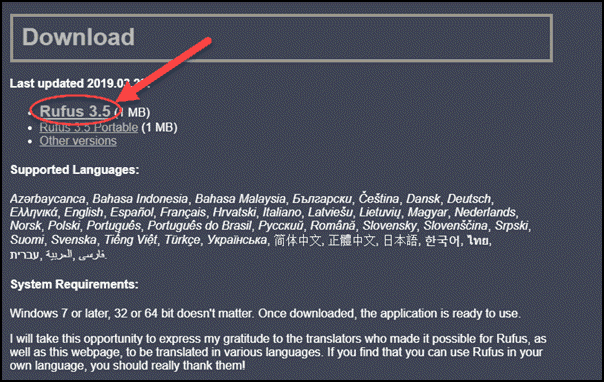
2. You will find a list of the latest updated versions. Today, these include Rufus 3.5 and Rufus 3.5 Portable or other available versions. Click on either one of the first two, choose to Save and then Run the file.
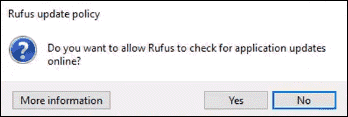
3. A pop-up screen will ask you if you want Rufus to check for application updates online. Click on No.
4. Now, Rufus will open and should appear as in the image below:
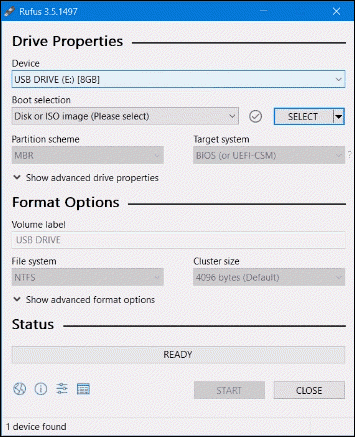
5. Insert the USB flash drive. Rufus will automatically detect it as a Device. Set the USB as your device of choice.
6. Next, in the Boot selection, click on the Disk or ISO image option in the drop-down menu and then on select to find the iso file.
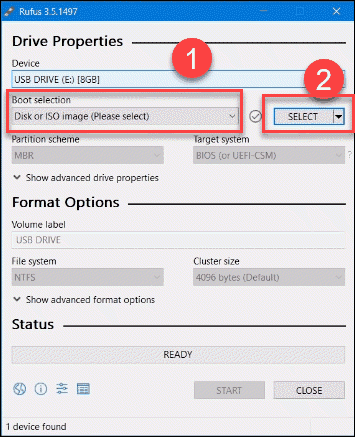
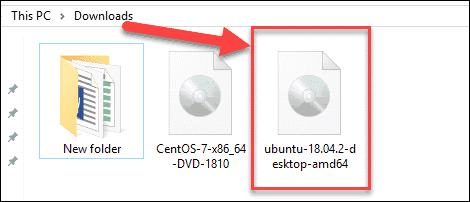
7. A new window will pop up in which you need to navigate to the folder in which the Ubuntu 18.04 iso image is located. Select the iso file and click on Open.
8. This will return you to the Rufus menu. Now everything is set up, click on Start.
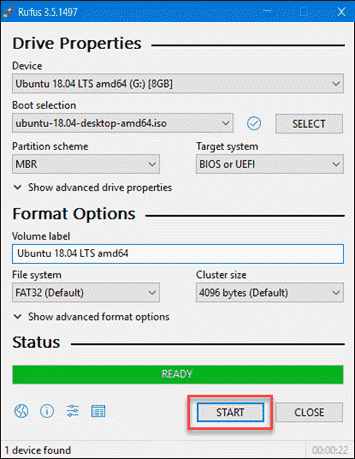
Note: You will receive a warning message that all data on the selected USB will be destroyed. If you have important data on it, make sure to transfer it to some other device before this process.
Step 3: Boot from USB
1. Switch off your computer and remove all other USB devices (like printers, memory cards, etc.).
2. Insert the bootable USB and switch on the computer.
3. Next, one of two things will happen:
- The computer will automatically boot from the USB if our BIOS/UEFI is set up correctly.
- You need to set up boot from USB manually, through the Boot Menu or BIOS/UEFI.
Boot USB from Boot Menu
As the computer is switching on, you can access the Boot Menu by pressing the correct key (or combination of keys). The keys that take you to the required menu depend on the brand of computer. This is the list of common keys based on the brand:
| Asus | F8 or Esc |
| Acer | F12, F9 or Esc |
| Compaq | F9 or Esc |
| Dell | F12 |
| eMachines | F12 |
| Fujitsu | F12 |
| HP | F9 or Esc |
| Lenovo | F8, F10 or F12 |
| Samsung | F2, F12 or Esc |
| Toshiba | F12 |
Once you have accessed the Boot Menu, select the USB as the device to boot from and press Enter.
If you are unable to boot from the USB this way, try doing it by opening BIOS/UEFI.
Boot USB from BIOS/UEFI
Just as accessing the Boot Menu, to open the BIOS/EUFI you need to hit the correct keys that correspond to the computer brand. The list of common keys for accessing the BIOS/UEFI is:
| Asus | F9 or Del |
| Acer | F2, F9 or Del |
| Compaq | F10 |
| Dell | F2 |
| eMachines | Tab or Del |
| Fujitsu | F2 |
| HP | F10, F11 or Esc |
| Lenovo | F1 or F2 |
| Samsung | F2 |
| Toshiba | F1, F2, F12 or Esc |
Once you access the BIOS/UEFI, find the Boot Device Select Menu and set the USB as first in the Boot Order. With this configuration in place, your computer will boot from the USB (if possible). If there is no bootable flash drive present, it will run the OS from the hard drive, as per usual.
Note: Make sure to disable legacy mode or secure boot, if your system has this option.
Note: If you have a dual boot machine, you can set up Ubuntu along with your existing operating system. In this case, you will need to select Something else and create the partitions.
Step 4: Run Ubuntu
When you have successfully managed to boot the system from the USB, a Welcome screen will appear as in the following image:

The welcome screen offers you two options:
- Try Ubuntu directly from the CD, without installing
- Install Ubuntu
Step 5: Install Ubuntu 18.04
1. To install Ubuntu 18.04, click the Install Ubuntu button and an installation wizard will appear.
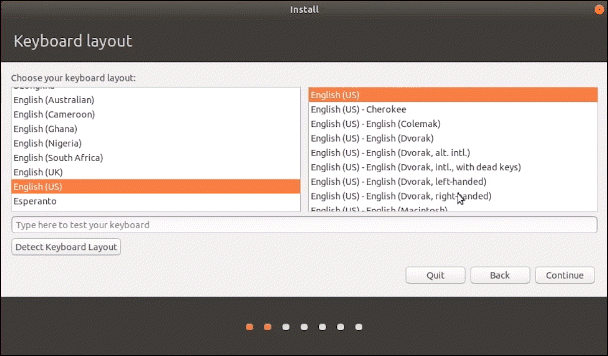
2. First, choose a language for the keyboard layout and click on Continue. In this example, we opted for English.
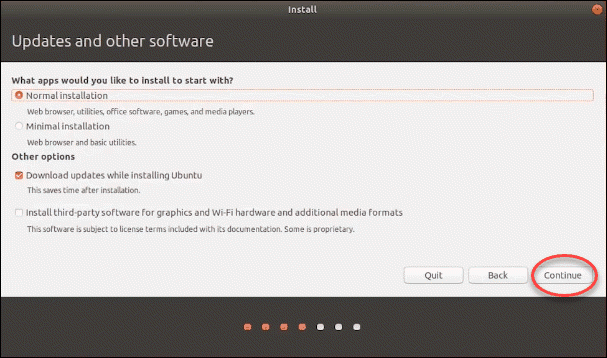
3. Next, select whether you want the Normal or Minimal installation. The difference is the number of apps it includes.
Also, you can choose if you want the system to Download updates while installing Ubuntu (which is recommended) and Install third-party software (optional).
Once you have decided, click on Continue.
4. The wizard will ask you what kind of installation type you want to perform.
If you have backed up all your data, we recommend choosing to Erase disk and install Ubuntu. Again, be aware that this will delete all data on your underlying operating system.
Finish by clicking on Install Now.
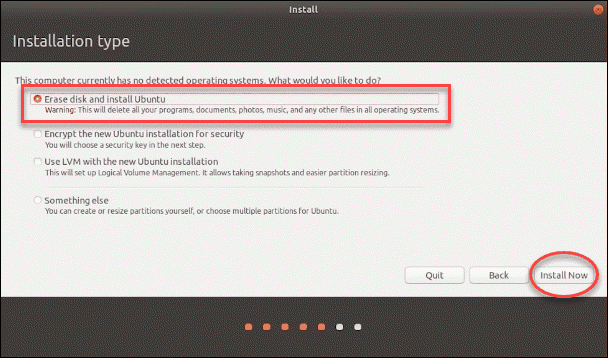
Note: If you have a dual boot machine, you can set up Ubuntu along with your existing operating system. In this case, you will select Something else and create the partitions.
5. A pop-up window will inform you what kind of changes it will make to your disk. Click on Continue to agree to the changes and erase any existing software on your drive.
6. Next, it will ask you for your location (time zone). Select the appropriate one and press Continue. Or read our tutorial on setting the Timezone, Date, and Time on Ubuntu.
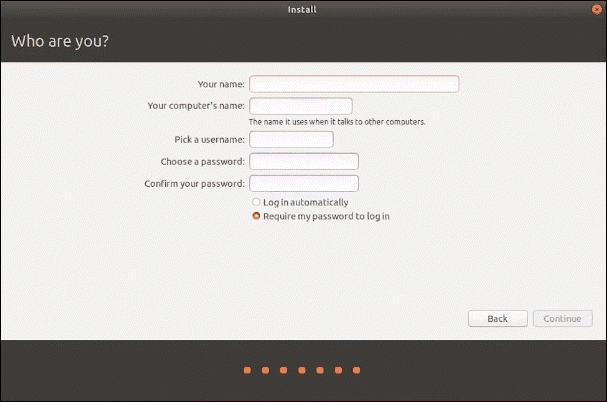
7. In the next section, type in the required information, such as username and password for the root user. Then, hit Continue.
8. With this, the official installation begins.
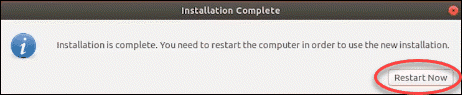
9. Once the installation is complete, the following message will appear. Take out the USB and Restart the system, as suggested.
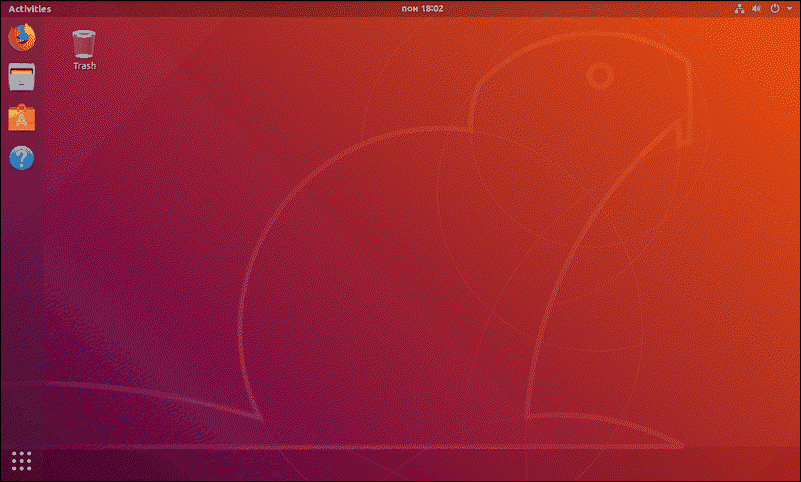
10. If you see this screen below after restarting, congratulations! You have successfully installed Ubuntu 18.04.
Conclusion
After reading this tutorial, you now know how to install Ubuntu 18.04 Bionic Beaver. Now you’re ready to explore all the possibilities of this free, open-source operating system.
