Introduction
Maven is an automation tool primarily used for Java projects. It simplifies project management by automatically downloading required libraries, managing their versions, and reducing manual effort and potential conflicts.
The following text explains how to install Maven on Debian using two different methods.

Prerequisites
- A system running Debian (this tutorial uses Debian 12).
- Access to a user account with sudo or root privileges.
- Access to the terminal.
- Java Development Kit (JDK) installed.
Note: Apache Maven requires the Java Development Kit (JDK) 8 or above. If you don't have it, install it with sudo apt install default-jdk.
Install Maven on Debian via Package Manager
The easiest way to install Maven on Debian is via the package manager. To accomplish that, take the following steps:
1. Update the repository index:
sudo apt update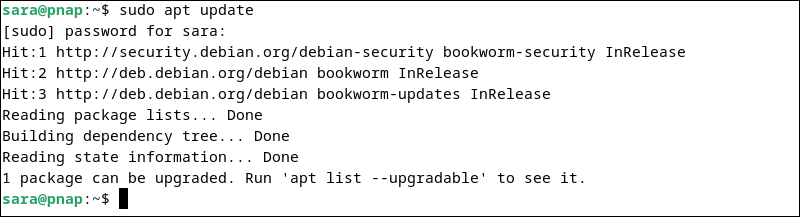
2. Install Apache Maven by entering the following:
sudo apt install maven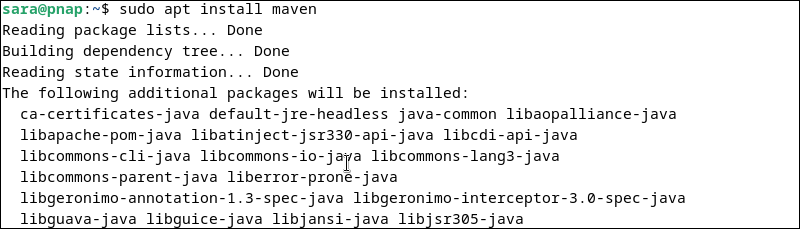
3. To verify Maven is installed, run the following command:
mvn --version
The system shows information about the Apache Maven version, the location of Maven Home, and the Java version currently installed.
Install Maven on Debian via the Official Archive
Installing Maven on Debian via the official archive requires more manual configuration and maintenance than using the package manager.
However, this type of installation allows for version flexibility, customization, and access to the latest software. To install Maven, take the following steps.
Step 1: Download the Official Maven Archive
Use the wget command to download the files to the /tmp directory. The /tmp directory is designed to store temporary files and data. Run the following:
sudo wget https://dlcdn.apache.org/maven/maven-3/3.9.6/binaries/apache-maven-3.9.6-bin.tar.gz -P /tmp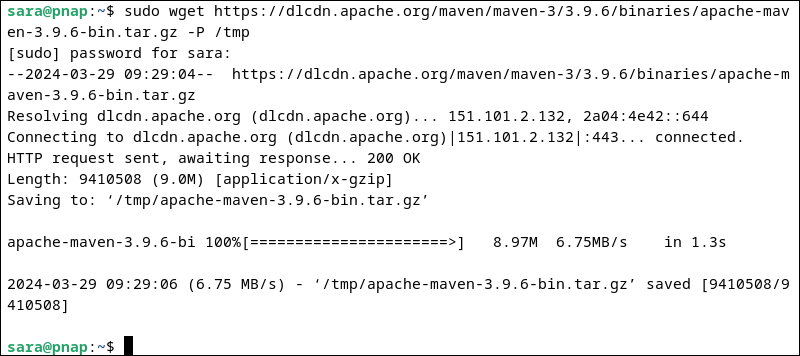
At the time this article was written, Apache Maven was at version 3.9.6. To get the latest version, visit the developer's download page and copy the link.
Step 2: Extract Maven Archive
Extract the .tar.gz file to the /opt directory. The /opt directory holds optional software installations, keeping the main filesystem clean. To extract files, run the tar command:
sudo tar xf /tmp/apache-maven-3.9.6-bin.tar.gz -C /optThe command has no output, but -C ensures files are extracted in the /opt directory.
Note: If you're using a different Maven version, change 3.9.6 to the version you downloaded.
After extracting files, create a symbolic link to the software location. This shortcut makes it easier to access the software without navigating directly to its directory. To accomplish this, run the following:
sudo ln -s /opt/apache-maven-3.9.6 /opt/mavenThe command has no output.
Step 3: Configure Environment Variables
Like most Linux software, Apache Maven uses a configuration file. This file should be located at /etc/profile.d/maven.sh. If the file is not present, create it. Follow these steps:
1. Open or create the file in a text editor of choice. For example, to create a file with Nano, run:
sudo nano /etc/profile.d/maven.sh2. Enter the following lines:
# Apache Maven Environmental Variables

# Set Java Home
export JAVA_HOME=/usr/lib/jvm/default-java

# Set Maven Home (choose either M2_HOME or MAVEN_HOME based on your preference)
export M2_HOME=/opt/maven
# export MAVEN_HOME=/opt/maven

# Add Maven bin directory to PATH
export PATH=${M2_HOME}/bin:${PATH}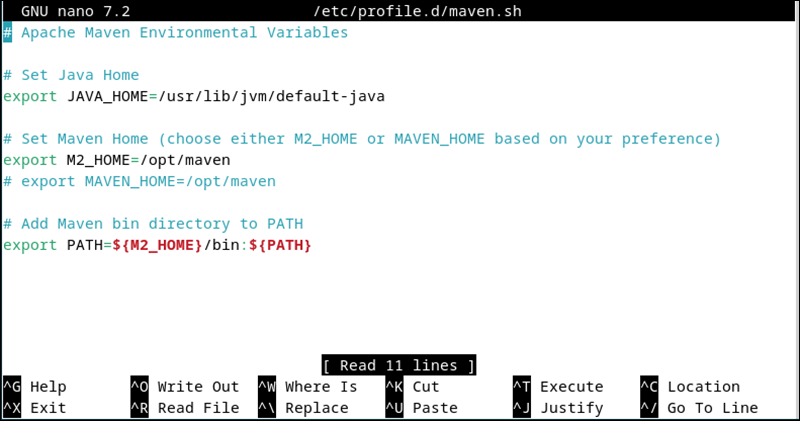
Save the file and exit.
3. Change the file permissions by entering the following:
sudo chmod +x /etc/profile.d/maven.shThe command has no output but allows the file to be executed as a script or program.
4. Load the file with:
source /etc/profile.d/maven.shThe command does not output anything. However, it ensures that changes made to environment variables or other settings within the file are applied immediately.
Step 4: Verify Maven Installation
Enter the following:
mvn –version
The system displays the Apache Maven version, the Maven Home location, and the Java version.
Creating a Project With Maven
Maven simplifies project setup by automating dependencies, building configurations, and project directory structures. This procedure makes it easier for developers to manage Java projects efficiently.
For instance, create a simple project by following the steps below.
Step 1: Create New Directory
Create a new directory for the Maven project. Name it maven-project1, for example. Use the mkdir command:
mkdir maven-project1The command has no output. To navigate to the project directory, use the cd command:
cd maven-project1
Step 2: Create the pom.xml File
The pom.xml file in Maven is an essential configuration file that defines a Maven project's structure, dependencies, plugins, and build settings. While in the project directory, create pom.xml with a text editor of choice. For instance, in Nano:
nano pom.xmlAdd the following content to the file:
<project xmlns="http://maven.apache.org/POM/4.0.0"
         xmlns:xsi="http://www.w3.org/2001/XMLSchema-instance"
         xsi:schemaLocation="http://maven.apache.org/POM/4.0.0 http://maven.apache.org/xsd/maven-4.0.0.xsd">
    <modelVersion>4.0.0</modelVersion>
    <groupId>com.example</groupId>
    <artifactId>maven-project1</artifactId>
    <version>1.0-SNAPSHOT</version>
    <build>
        <plugins>
            <plugin>
                <groupId>org.apache.maven.plugins</groupId>
                <artifactId>maven-compiler-plugin</artifactId>
                <version>3.8.1</version>
                <configuration>
                    <source>1.8</source>
                    <target>1.8</target>
                </configuration>
            </plugin>
        </plugins>
    </build>
</project>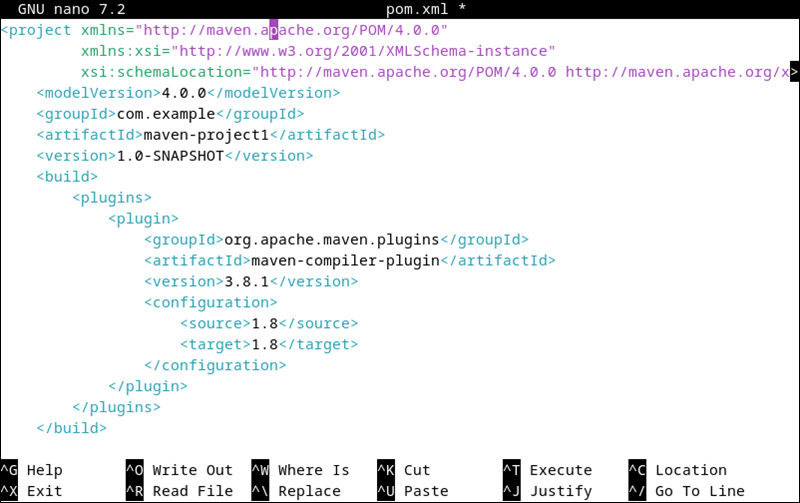
The configuration file consists of:
<project>. The root element that defines the Maven project.<modelVersion>. Sets the Project Object Model (POM) version to which the file adheres. The POM model version defines the structure and elements used in the pom.xml file.<groupId>. Specifies the project group ID. In this case, it'scom.example.<artifactId>. Sets the project artifact ID. It should match the project name, which ismaven-project1in this case.<version>. Specifies the project version. The value1.0-SNAPSHOTis a common convention for the initial development version.<build>. Contains the configuration for the Maven build process.<plugins>. Defines Maven plugins to be used in the build process.<plugin>. Specifies a Maven plugin. In this case, themaven-compiler-pluginis used to compile Java code.<groupId>. Sets the plugin group ID.<artifactId>. Determines the plugin artifact ID.<version>. Specifies the plugin version to use.<configuration>. Allows a user to configure plugin-specific settings. This example sets the Java source and target versions to 1.8.
After adding the text, save and exit the file.
Step 3: Create Java Source Code
To create Java source code, follow these steps:
1. Create a directory named src/main/java/com/example inside the project directory. Use mkdir with the -p option to create parent directories if they don't exist:
mkdir -p src/main/java/com/exampleThe command has no output
2. Navigate to the src/main/java/com/example directory:
cd src/main/java/com/example
3. Inside the com/example directory, create a Java file named App.java using a text editor. For example, with Nano:
nano App.java4. Paste the following inside the App.java file:
package com.example;

public class App {
    public static void main(String[] args) {
        System.out.println("Hello, Maven!");
    }
}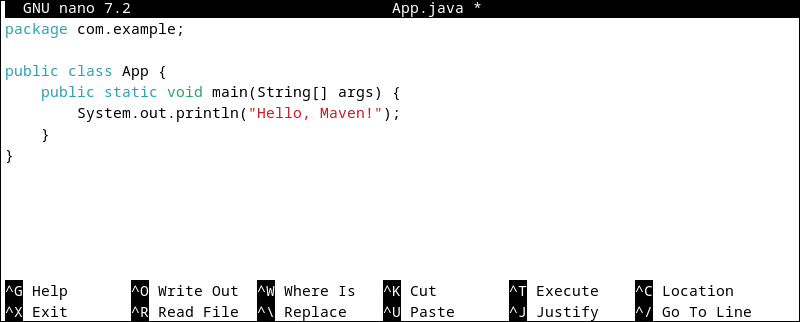
The file consists of:
package com.example;. The package declaration defines the package to which the Java file belongs. Packages help organize and manage code.public class App { ... }. The class declaration that defines a class calledApp, which is a blueprint for objects in Java.public static void main(String[] args) { ... }. The main method that represents the entry point of the Java program. Executes the code when the program starts.String[] args. Allows passing command-line arguments.
System.out.println("Hello, Maven!");. The print statement that prints "Hello, Maven!" to the console when the program runs.
After adding the text, save and exit the file.
Step 4: Build the Project
To build the project, first navigate to the project directory, in this case maven-project1:
cd maven-project1Once there, run the following to compile the Java source code:
mvn package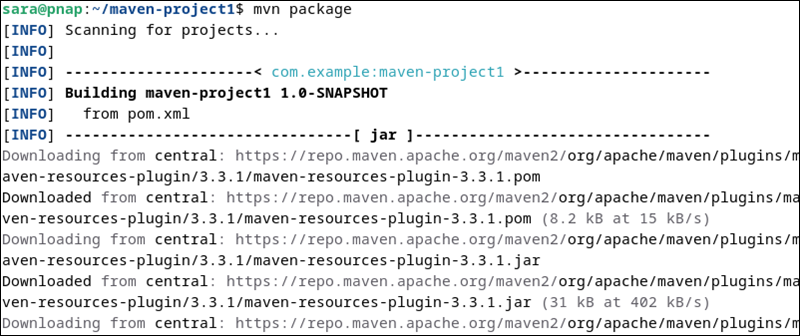
Step 5: Execute the Application
After a successful build, execute the application using the following command:
java -cp target/maven-project1-1.0-SNAPSHOT.jar com.example.App
The command launches the Java program (App) from the compiled JAR file (my-maven-project-1.0-SNAPSHOT.jar) using the Java runtime environment.
The output shows Hello, Maven! to indicate the application is working.
Conclusion
After reading this article, you know how to install Maven on Debian via the package manager or the official archive. You have also learned how to create a simple project with Maven.
Next, read the Maven vs. Jenkins comparison.
